Free-Form
Updated 26/02/2026_

You’ve now worked through Part 1 — Org Health & Monitoring and Part 2 — Advanced UI Customisation: signals, hygiene, Lightning apps, and record pages. With those foundations in place, it’s time to turn your attention to the engine room of the platform: Automation.
This chapter is where Salesforce stops being a system you configure and starts becoming a system that works for you. Declarative automation is the backbone of every well‑run org, and Flow is the tool that brings it all together without writing a line of code.
As a future developer, learning Flow isn’t optional. It teaches you how Salesforce thinks: how records move, how transactions behave, how to design for scale, and how to build solutions that are maintainable long after you’ve moved on. Many of the patterns you’ll use in Apex begin here, in the declarative world.
Earlier parts of this series briefly mentioned Salesforce’s legacy automation tools: Workflow Rules and Process Builder. At this stage, it’s enough to know what they are and why they exist, because you will still see them in many real‑world orgs:
These tools are important historically, and you will encounter them when maintaining existing implementations. However, Salesforce has made it clear that the future of declarative automation is Salesforce Flow. New features, performance improvements, and recommended patterns are all focused on Flow, and Workflow Rules/Process Builder are on a retirement path.
As an aspiring developer, this means two things:
Salesforce Flow is the primary way to automate business processes on the Salesforce platform. It has effectively replaced Workflow Rules and Process Builder for new automation, and Salesforce is investing all new declarative automation capabilities into Flow.
At its core, a flow is an application that automates a business process by collecting data and performing actions inside your Salesforce org. It works like a visual flowchart, guiding Salesforce through a series of steps to execute defined logic. The primary tool for building these automations is Flow Builder, a user‑friendly interface that lets you configure elements through a simple drag‑and‑drop experience.
Flow Builder is the visual workbench where business intent becomes executable automation. It’s a drag‑and‑drop design surface in Setup (or the Automation App) that lets you model processes as readable, maintainable flows instead of lines of code. Think of a flow as a small program you can inspect visually, version, and hand off to other admins or developers.
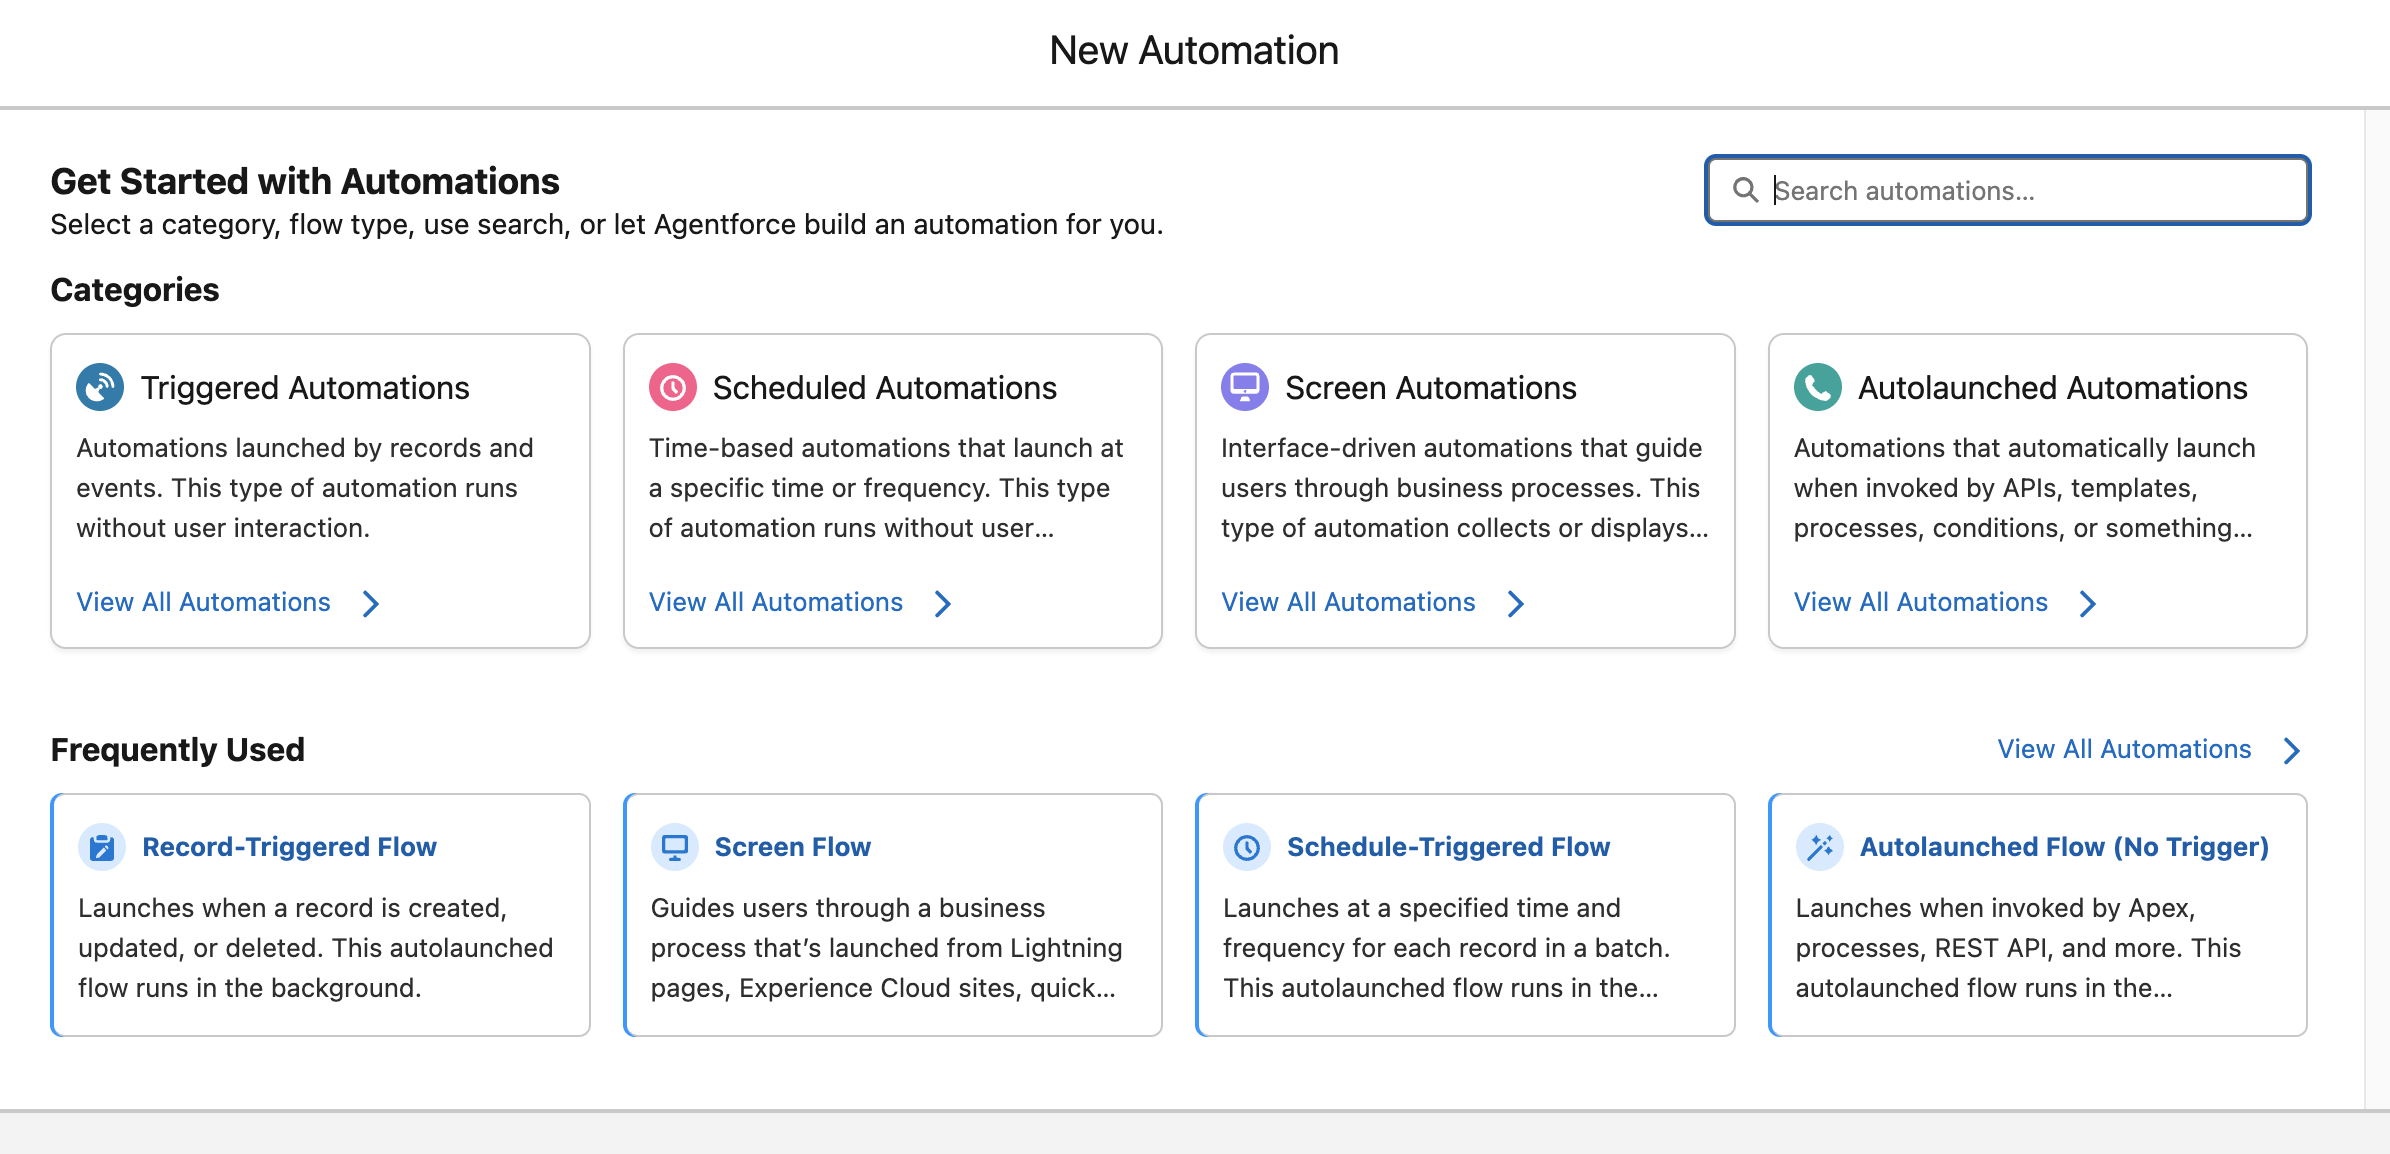
Flows start from a few clear entry points: Screen, Record‑Triggered, Scheduled‑Triggered, and Autolaunched and execute in different modes such as fast field updates (before save) or after‑save actions. You compose behaviour on the canvas using a small set of element types: data operations, logic, loops and collections, user interaction, and actions that may call Apex or external services. That combination gives Flow the flexibility to handle everything from simple field updates to multi‑step, human‑in‑the‑loop processes.
Because Flow sits between configuration and code, it is usually the first place to solve business requirements. Use Flow when you want clarity, reuse, and rapid iteration; choose Apex only when you need advanced performance, complex algorithms, or control that Flow cannot provide.
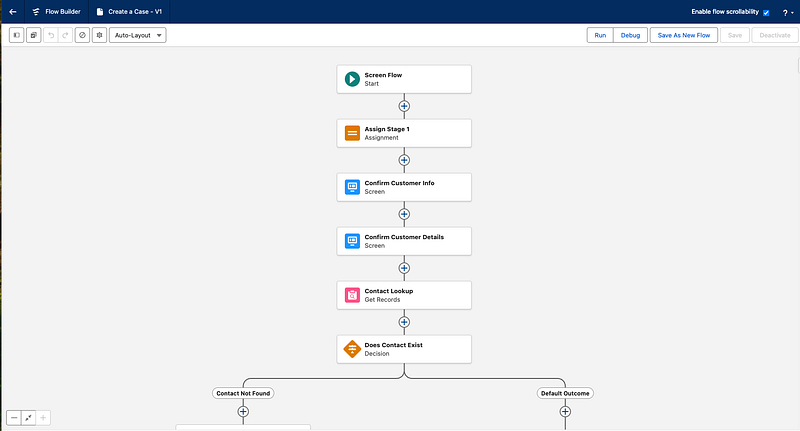
Flow Builder Screenshot
A big part of becoming a strong Salesforce professional is knowing which kind of automation to use for a given business problem. Salesforce offers many different Flow types, but they all fit into four broad categories that describe how the automation begins. Thinking in terms of these categories gives you a much clearer way to design, organise, and troubleshoot your automations, because each category solves a different kind of problem.
| Flow Category | Trigger | Typical Use Case |
|---|---|---|
| Screen Automations | User‑initiated | Guided UI wizards and forms |
| Triggered Automations | Record create/update/delete | Replace Process Builder / Workflow |
| Scheduled Automations | Defined schedule (e.g., nightly) | Batch operations and reminders |
| Autolaunched Automations | Called from other flows, Apex, or API | Reusable subflows and utilities |
Once you understand these four categories, the long list of Flow types in Setup becomes much easier to navigate. Each category has its own strengths, its own best‑fit scenarios, and its own design considerations, and together they cover almost every automation need in your Salesforce org.
Screen Automations are interactive flows that guide a user through one or more screens, collecting inputs and presenting information as they go, rather than running silently in the background. They’re launched from user‑initiated entry points such as buttons, quick actions, Lightning pages, the utility bar, or Experience Cloud pages, and they run entirely in the user’s context, respecting that user’s permissions and sharing.
Use Screen Flows when you need a guided, multi‑step experience (for example, a wizard to create a complex Opportunity, a structured case intake interview, or a guided troubleshooting script) where you want to control what the user sees, validate their inputs, and conditionally show or hide fields based on previous answers. They’re usually a better choice than stuffing logic into page layouts alone, because they keep the “what to ask” and “what to do next” logic in one place while still leveraging standard components and custom Lightning components for the UI.
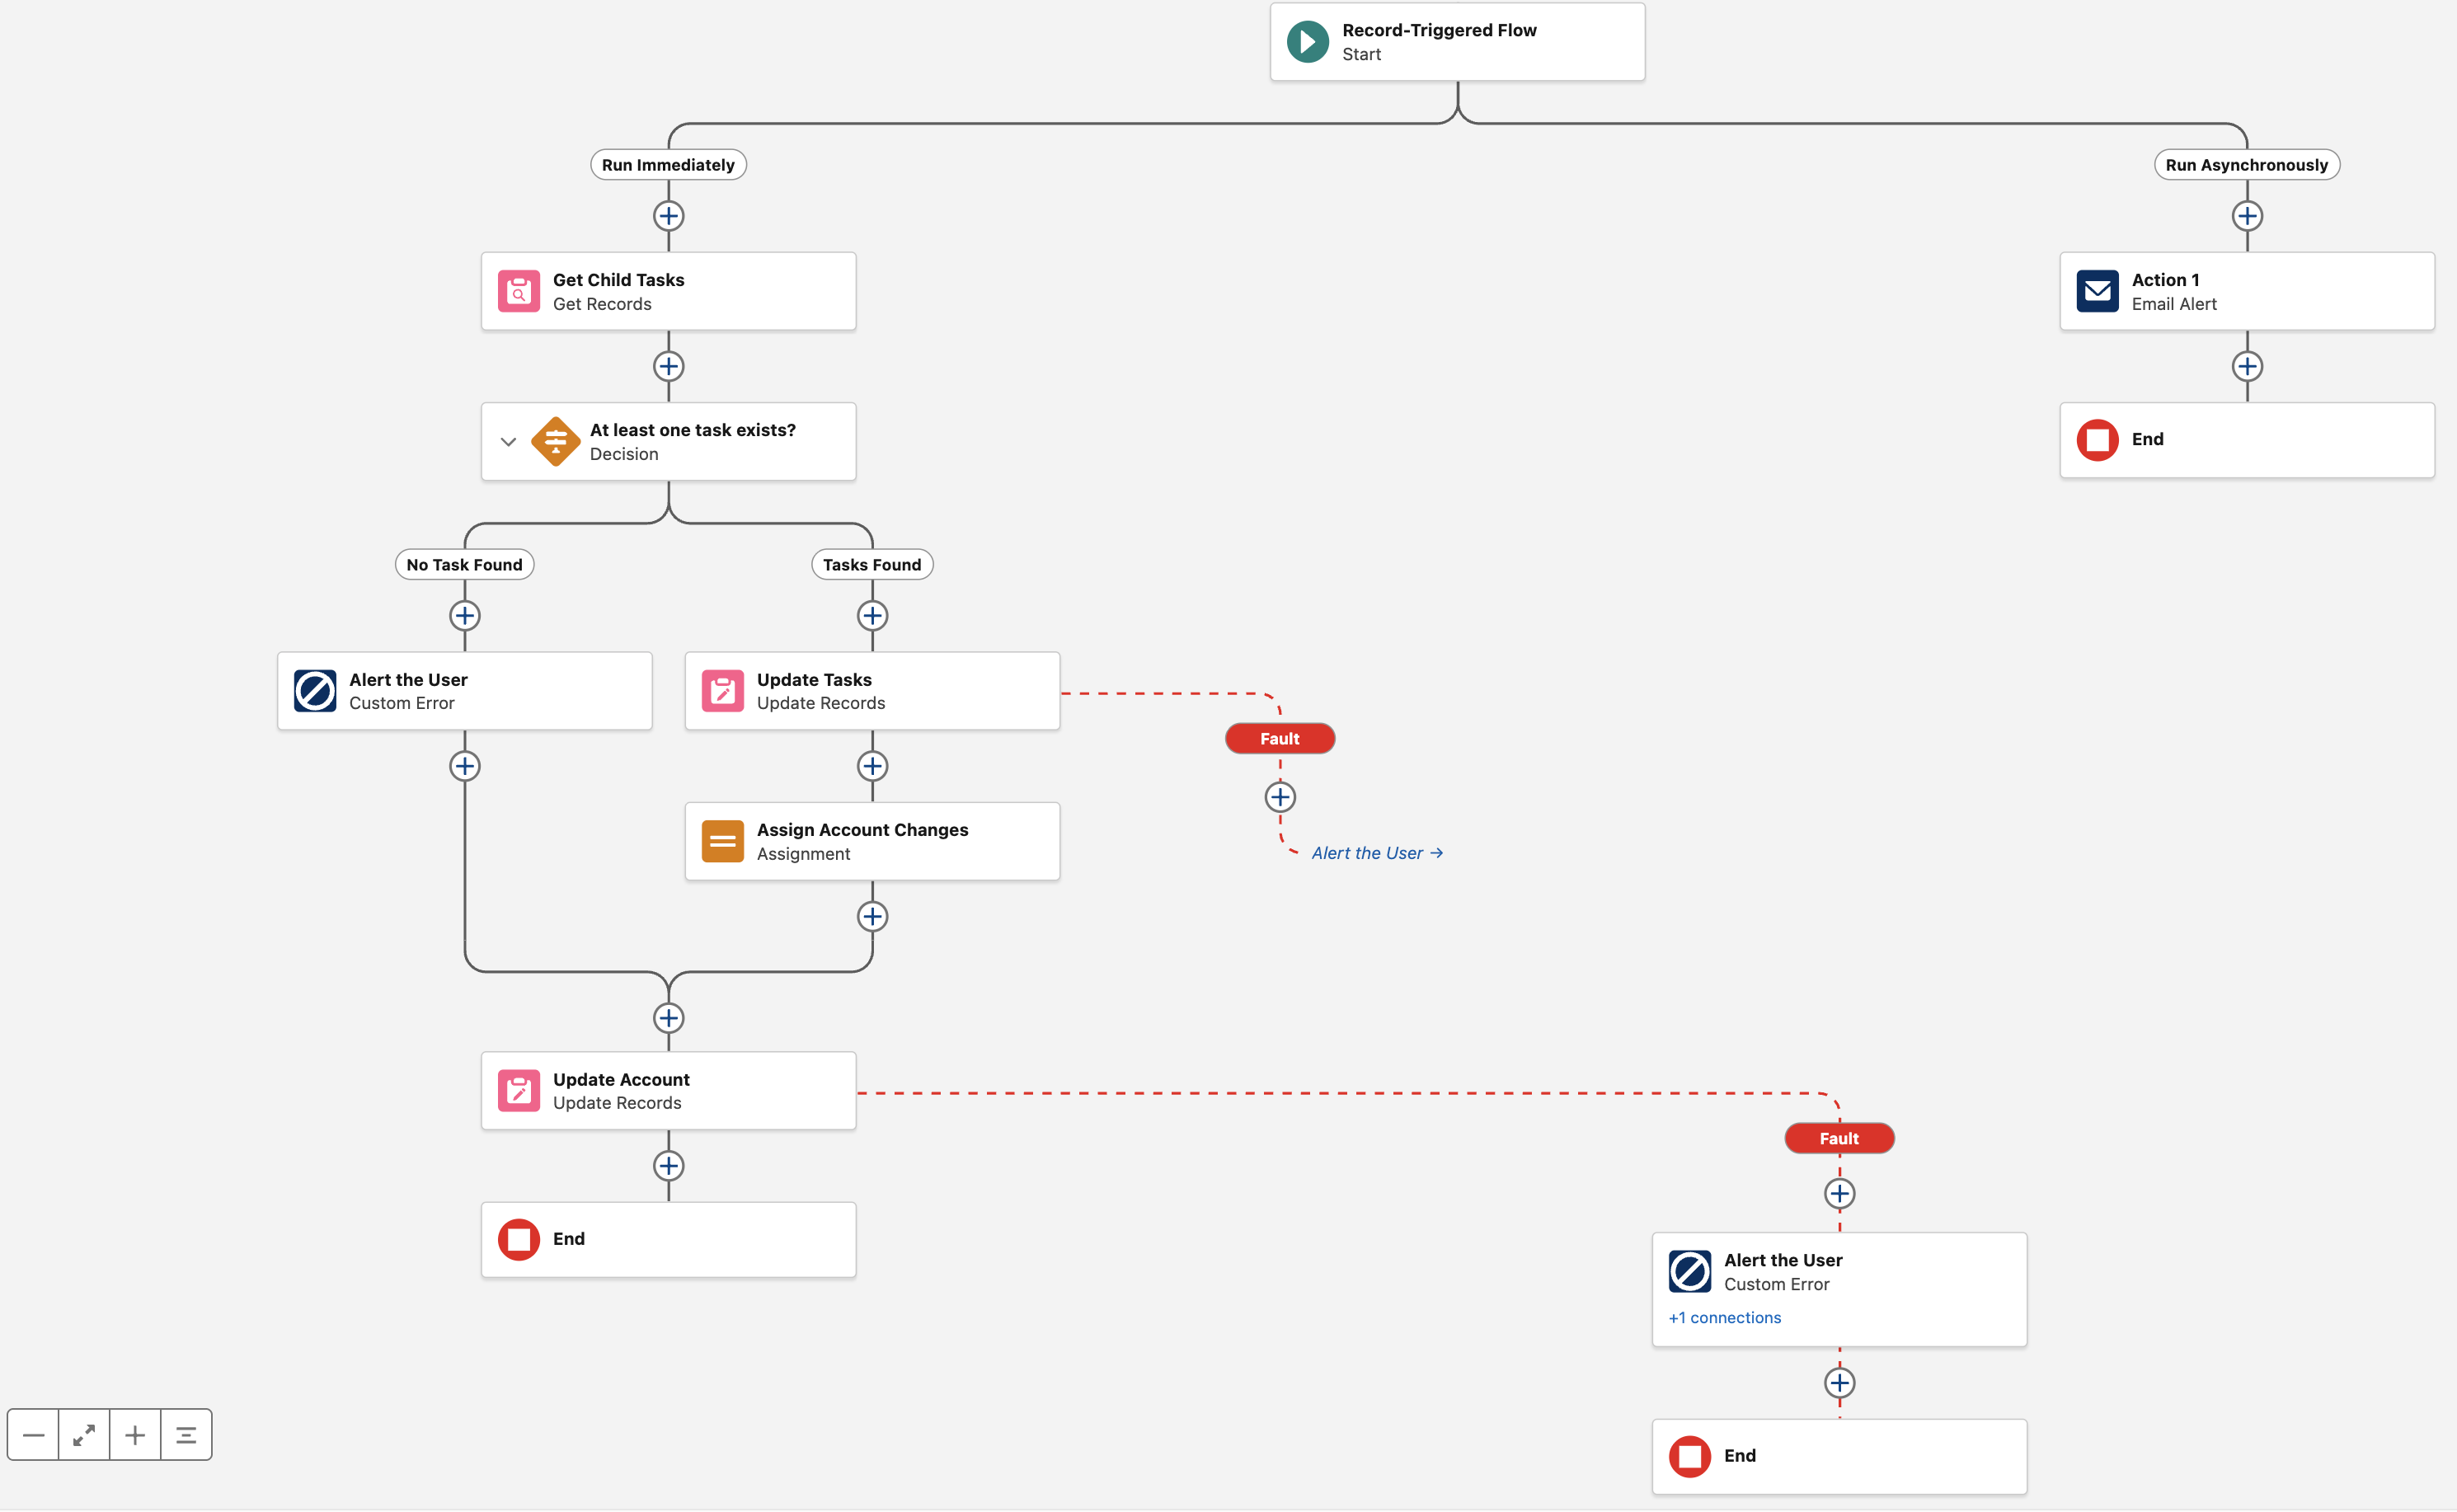
Triggered Automations start when something happens in Salesforce. Instead of waiting for a user to click a button or open a screen, these flows fire automatically in response to events inside or outside the platform. The two most common triggers are changes to Salesforce records and incoming platform event messages.
Run when a record is created, updated, or deleted. They are the modern replacement for Workflow Rules and Process Builder, and they shine when you need consistent, behind‑the‑scenes automation that reacts to data changes. They can update fields, create related records, send notifications, call subflows, or enforce cross‑object rules, all without user involvement.
Record‑triggered flows offer two execution modes, and choosing between them depends on the type of work your automation needs to perform but has a major impacts on performance, clarity, and governor‑limit safety.
Different automation scenarios benefit from different execution timings, so it helps to understand how the two modes behave. Before‑save flows are optimised for speed and simple field updates, while after‑save flows unlock the full power of Flow by allowing related‑record DML, actions, and callouts.
Use this table as a quick decision guide:
| Scenario | Before‑Save Flow | After‑Save Flow |
|---|---|---|
| Update fields on the same record only | Yes — fastest and most efficient | Not needed |
| Create or update related records | Not supported | Yes |
| Send emails, post to Chatter, or call Apex | Not supported | Yes |
| Make callouts or use external services | Not supported | Yes |
| Need the record Id created during the transaction | Not available | Yes |
| High‑volume data loads where performance matters | Ideal | Use only if required |
Prefer before‑save flows whenever you only need to update fields on the triggering record. They avoid DML entirely and are significantly faster. Choose after‑save flows when your automation needs to work with related records, perform actions, or call out to external systems.
Start when a platform event message is published. These are ideal for event‑driven integrations and asynchronous processing, because they let you respond to external systems or decoupled processes in a clean, scalable way. They always run after the transaction commits and always run in system context, which makes them reliable for high‑volume or integration‑heavy scenarios.
When you want Salesforce to react immediately and consistently to changes or events, without relying on user actions or scheduled jobs.
Scheduled Automations run on a timetable you define rather than reacting to a specific record change. They are perfect for background jobs that need to run regularly, such as nightly clean‑up tasks, recalculating fields across many records, or sending reminders ahead of contract renewals.
A Scheduled Automation evaluates a set of records that meet your filter criteria and processes them in batches at the scheduled time. Because they run without screens or user interaction, they are purely back‑end automation and can be timed for off‑hours to reduce contention with users and minimise the risk of record update conflicts.
Use Scheduled Automations when the work does not need to happen in real time and is better handled in predictable, controlled batches.
Autolaunched Flows (No Trigger) are flows that define no trigger of their own; instead, they run only when something else explicitly starts them, such as another flow, Apex, a REST API call, or a custom button or link. They contain no screens, which makes them ideal for encapsulating reusable business logic that you want to maintain in one place and invoke from many entry points.
A common pattern is to put the heavy lifting (data validation, creation of related records, complex branching) into an Autolaunched Flow and then have multiple Record‑Triggered, Scheduled‑Triggered, or Screen Flows call it as a subflow, so you have a single place to maintain that logic over time. This type of flow is also a good fit when developers or integrations need a declarative “service” to call from Apex or external systems, because you can define clear input and output variables and let Flow handle the orchestration while the caller simply passes in parameters.
Every flow is built from three core ingredients: elements, paths and resources. Each plays a different role in how the flow behaves, and understanding how they fit together gives you a clear mental model for everything you build in Flow Builder.
These are the steps of the flow; actions, logic decisions, and data operations that do the actual work. When you add something onto the canvas, you’re adding an element. Each one represents a discrete moment in the automation, whether that’s showing a screen, updating a record, looping through a collection, or calling a subflow.
These are the connectors that determine the order in which the flow moves from one element to the next. They define the possible routes the flow can take, whether that’s a simple linear sequence, a branching decision, a loop, or a scheduled or fault‑handling path. Paths are what turn a collection of elements into a coherent automation.
Resources are the flow’s memory. They hold the values, records, collections, and formulas that the flow uses and updates as it runs. Any time the flow needs to store something temporarily it goes into a resource. They are what allow elements to pass information to one another and make decisions based on the data.
Together, elements, paths and resources form the structure, movement and memory of a flow. Once you understand how these three pieces interact, the rest of Flow Builder becomes far easier to reason about. The next sections break each of them down in more detail.
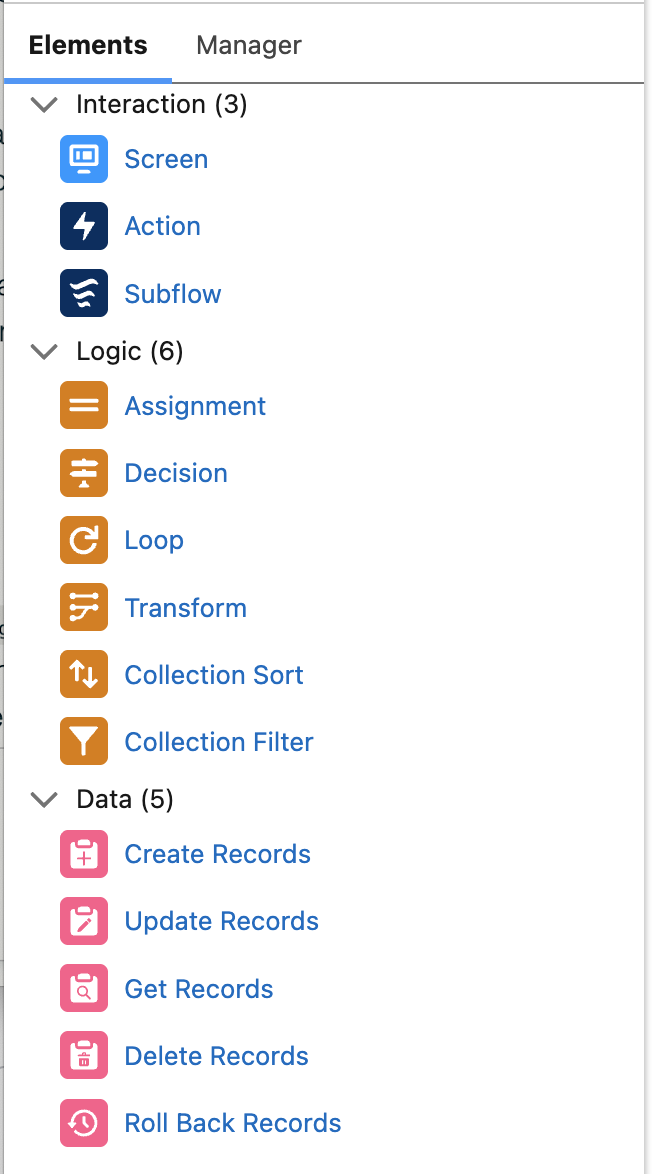
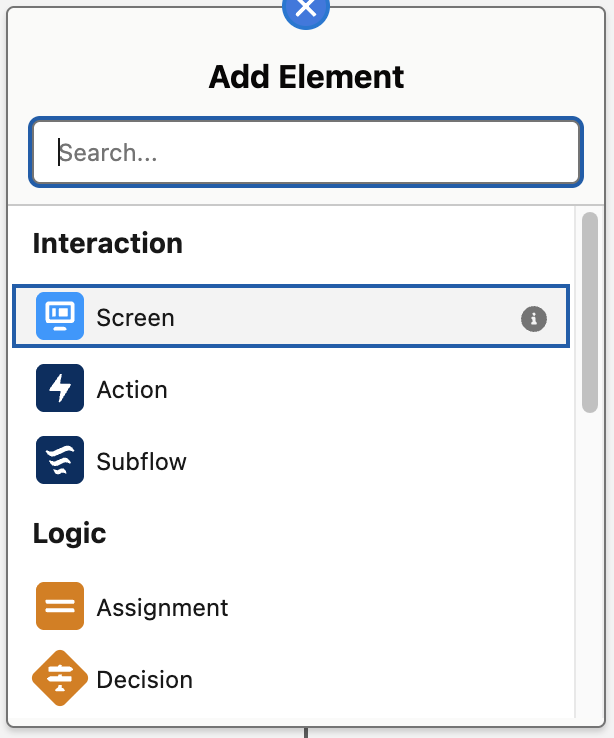
Flow Elements are the discrete building blocks you place on the canvas to express behaviour. Use this section as a quick reference: a compact table for scanning, then short, practical notes for each element that mirror the tone and structure of your Flow Types section.
| Element | Purpose | Typical Use Case |
|---|---|---|
| Screen | Collect user input and present information | Multi‑step wizards and guided forms |
| Action | Invoke Apex, platform actions, or external services | Callouts, complex logic, emails, Chatter, external APIs |
| Subflow | Reuse another flow from within the current flow | Centralize business rules or utilities across many flows |
| Assignment | Set or adjust variables and build up collections | Prepare data for bulk DML, flags, counters, and mappings |
| Decision | Branch execution based on conditions | Route logic for different outcomes or error paths |
| Wait for Conditions | Pause until record criteria or events are met, then resume | Wait for a status/field change or event before continuing a process |
| Wait for Amount of Time | Pause for a fixed duration before continuing | Delay follow‑ups, throttling, or reminder steps by a set time window |
| Wait Until Date | Pause until a specific date and time, then resume | Time‑dependent actions like contract or renewal reminders on an exact date |
| Loop | Iterate over each item in a collection | Apply the same logic to a list of records or inputs |
| Transform | Map and transform source data into a new target structure | Convert API or record data into a different object/schema in one step |
| Collection Sort | Order items in a collection by one or more fields | Ensure predictable processing order (e.g. oldest, largest) |
| Collection Filter | Create a filtered subset of a collection | Keep only items that meet criteria without re‑querying |
| Create Records | Insert new records in Salesforce | Bulk create related or child records from flow data |
| Update Records | Update existing records | Apply field changes to many records at once |
| Get Records | Query Salesforce data into the flow | Read related records or seed processing with context |
| Delete Records | Remove records from Salesforce | Cleanup or enforce lifecycle / archival rules |
| Roll Back Records | Undo DML from the current flow transaction | Revert partial changes when a critical error occurs |
| Fault Path | Handle errors thrown by an element | Log errors, notify admins, and show user friendly messages |
Free-Form
Auto-Layout
The Screen element is how a flow talks to a human user: it displays information, collects inputs, and then hands control back to the flow once the user clicks Next, Previous, or Finish. Screens can contain standard components like text fields, picklists, lookups, file uploads, and display text, as well as custom Lightning components that encapsulate more complex UI or behaviour. Because Screen elements run in the context of the current user, they automatically respect that user’s permissions and sharing and are ideal for guided experiences such as wizards, multi‑step forms, or helper tools in the utility bar. Well‑designed screens ask only for what’s needed at each step, use conditional visibility to show or hide fields based on earlier answers, and surface validation messages that explain clearly what the user needs to fix.
The Action element lets a flow call functionality that lives outside the flow itself, such as invocable Apex, a platform action, an HTTP callout, an email alert, or a Chatter post. Instead of rebuilding everything in Flow, you can expose reusable behaviours—as actions—that admins and builders can drag into flows whenever they need that capability. Actions are especially valuable for integrations and advanced business logic, where a single Action element might orchestrate a complex sequence of operations in an external system while the flow only sends inputs and consumes the results.
The Subflow element allows one flow to call another flow, passing values into its input variables and optionally receiving values back from its output variables. This is the primary mechanism for reusing logic: you can design a flow that performs a well‑defined task (such as creating a standard set of related records, applying validation rules, or calculating a complex result) and then invoke it from many parent flows via Subflow elements. Subflows help keep individual flows smaller and easier to read, reduce duplication, and make it straightforward to update shared behaviour in a single place. When designing subflows, it is worth thinking of them like small services: give them a clear name and description, keep their inputs and outputs well‑typed and documented, and avoid mixing unrelated responsibilities in the same reusable component.
The Assignment element changes values inside the flow’s memory by setting or adjusting variables, including primitives, record variables, and collections. Instead of writing to the database directly, assignments shape the in‑memory state that later elements—such as Create Records, Update Records, and Screens—will use. Typical patterns include populating all the fields of a record variable before insertion, incrementing counters to track how many records met a certain condition, and building collections of records that will be updated in a single DML operation. Because assignments are so cheap compared to database operations, they are a central tool for keeping flows efficient: do as much work as possible with assignments first, then perform as few actual database writes as you can.
The Decision element evaluates data and then routes the flow down one of several named paths, much like an if‑else or switch statement in code. Each outcome on a Decision has its own set of conditions, such as “Priority equals High” or “Number of matching records is greater than zero,” and the flow follows the first outcome whose criteria evaluate to true, or a default outcome if none match. Decisions are the backbone of business rules in Flow, allowing you to separate logic for different scenarios (like different record types, customer tiers, or stages) into clearly labelled branches.
The Wait for Conditions element pauses a flow until certain criteria are satisfied, such as a field on a record reaching a specific value or a related record being created. Instead of forcing everything to happen immediately, you can design processes that progress only when the underlying data shows that the real-world event has occurred, for example:
When the conditions become true, Salesforce automatically resumes the flow from where it left off, continuing the remaining steps without user intervention. This approach is powerful for multi‑step processes that span minutes, days, or weeks, because the flow can effectively “wait in the background” for business events without consuming transaction time.
The Wait for Amount of Time element pauses a flow for a fixed duration, such as a certain number of minutes, hours, days, or months, before resuming execution. This element is useful when you want a guaranteed delay between two steps, regardless of changes to record fields or other conditions. Common examples include:
By building these waits into the flow logic instead of relying on separate scheduled jobs, you keep the orchestration for a business process in one place.
The Wait Until Date element pauses the flow until a specific point in time, determined by an absolute date‑time value or a calculation such as N days before a given date field. This makes it ideal for time‑dependent steps like renewal reminders, pre‑event communications, or “start on this date” processes that must line up with calendar milestones rather than just a relative duration. Once the target date and time arrives, Salesforce wakes up the flow and continues executing the subsequent elements as if no time had passed from the flow’s perspective. Using Wait Until Date keeps the scheduling close to the business logic, so you can easily see and adjust when follow‑ups or dependent actions will occur.
The Loop element processes each item in a collection one at a time, giving the flow a “current item” variable representing whichever record or value is being examined in that iteration. Inside a loop, you typically read and modify the current item, build up separate collections for later processing, or gather counts and aggregate values.
Loops are essential when a flow must apply the same rule or transformation to a whole set of records, such as updating all Contacts when an Account changes, classifying every task in a list, or constructing a bundle of related records from a screen input.
The Transform element maps and reshapes data from one structure into another in a single, visual step, replacing many combinations of Loop and Assignment for common mapping scenarios. You select a source resource (often a record collection, record, or an HTTP callout response) and a target resource, then define how each target field is populated from a source field, a constant, or a formula.
This is particularly powerful when integrating with external systems or APIs that return nested or differently‑shaped data, because you can convert that payload directly into the record or collection shape you need for Create or Update Records without hand‑coding each assignment. Used well, Transform makes flows easier to read and maintain, since the mapping logic is declared in one place and can be inspected and adjusted without digging through loop bodies.
The Collection Sort element reorders items in a collection according to one or more fields and sort directions, such as ascending by date or descending by amount. Use it when flow behaviour depends on order, for example:
Sorting explicitly ensures consistent behaviour. After sorting, any loops or screens that rely on that collection will see the items in the new order, which can simplify logic that assumes “first item” means “most important item” or “earliest pending item.”
Collection Sort is a cleaner alternative to encoding ordering logic into Decision elements or multiple Get Records calls when all the necessary data is already in memory.
The Collection Filter element takes an existing collection and outputs a new collection that contains only the items that meet filter criteria or satisfy a formula. This is useful when a previous Get Records or Transform step returned a broad set of data, but the next steps only apply to a subset.
As an example maybe you want to retrieve task records and process open tasks differently to closed ones. With a Collection Filter you can do one Get Records and filter into different collections for processing. By filtering in‑memory rather than re‑querying the database, you reduce the number of Get Records elements and keep your logic expressively close to where the data is being used.
The Create Records element inserts new records into Salesforce based on the values held in record variables or collections. You can create a single record by passing a single record variable, or many records at once by passing a collection, which is the preferred pattern for performance and governor‑limit friendliness. Typically, you use Assignments, Screens, or Transforms to populate or shape the data first, then call Create Records only once the flow has everything it needs to perform the insert. Centralising record creation in this way makes it easier to debug and reason about when records are actually written, and it allows you to add fault handling around that specific DML boundary.
The Update Records element modifies existing records, either those you already hold in a record variable or collection, or those identified by criteria the element can query on your behalf. Like Create Records, it supports both single‑record and bulk operations, and it is best used after you have staged all changes in memory through Assignments, Loops, and Transforms.
This pattern lets you ensure each record is only updated once per transaction, reducing the risk of hitting limits and keeping behaviour more predictable. A well‑placed Update Records element often represents the moment when a business rule is committed, for example, after calculating new values, enforcing validations, or aggregating children, so it also makes a natural place to attach fault handling.
The Get Records element queries Salesforce data and stores the results in record variables or collections so that the rest of the flow can work with real org data rather than hard‑coded assumptions.
You specify the object, set filter criteria and sort order, and choose whether to return a single record or many, as well as whether to store all fields or only selected ones. Once retrieved, these records can drive screens, decisions, loops, and subflows, making Get Records the main entry point for contextual information in a flow.
The Delete Records element removes records from Salesforce, either those referenced in record variables and collections or those matched by filter criteria defined in the element. Most often used in:
The Roll Back Records element is available in screen flows and lets you undo all database changes made in the current transaction, returning the data to the state it was in before the flow began performing DML.
Consider a screen flow that updates a lead and then schedules an appointment. If the appointment creation fails, the lead update would normally still be saved, leaving you with a partial outcome. By placing Roll Back Records on a fault path, the entire transaction is cancelled and none of the pending changes are committed.
This is especially useful when a flow performs several creates or updates, or when a late failure makes it safer to abandon the whole operation than to leave inconsistent data behind. Used deliberately, it ensures transactional consistency: either all intended changes succeed together, or none of them do. In practice, you combine Roll Back Records with Decisions and fault paths so your error‑handling logic can determine when to roll everything back and when a partial failure is acceptable.
The Custom Error element allows a Record Triggered Flow to raise a user friendly error message and roll back the entire transaction without writing a single line of Apex. It is one of the most powerful enforcement tools available to admins because it:
Once you understand the individual elements, the real magic is how you connect them. On the canvas, every line between elements is a connector, and each connector represents a possible path your flow can take at run time. Connectors define the execution order so the flow always follows the lines you draw.
A connector without a label is the default next step path: when an element finishes successfully, Salesforce follows that line to the next element. In Free‑Form mode, you drag from the node on one element to the element you want to run next. In Auto‑Layout mode, you click the + icon on the path to add the next element or connect to an existing one. Auto‑Layout also enforces a top‑to‑bottom flow direction, keeping connectors clean and structured.
Some elements introduce additional connector types:
Most elements, such as Assignments, Actions, and DML elements, only allow a single outgoing connector (plus a fault path). If you need branching, you introduce a Decision or Loop to create multiple paths.
As your flows grow more complex, these connectors become the backbone of your automation, defining every route the flow can take and every branch of logic it can follow. Most connectors describe the happy path, but flows also need a way to handle the moments when something goes wrong. That’s where fault paths come in.
Fault paths are special connectors from elements that define what the flow should do when that element throws an unhandled error, such as a failed DML operation, an integration timeout, or a missing record. Instead of letting the flow fail silently or show a cryptic message to the user, a fault path can log details to a custom error log object, send notifications to admins or support teams, and, in Screen Flows, present a friendly error message that explains what went wrong and what to try next.
Treating fault paths as first‑class parts of your flow design gives you observability into problems and makes it far easier to troubleshoot issues in production without relying solely on debug logs. Over time, a consistent fault‑handling pattern across flows also helps you spot systemic issues like recurring integration failures or configuration mistakes because they are all being captured in a predictable way.
Record‑triggered flows get one special kind of connector: scheduled paths. These let you say “when this record change happens, run part of the flow later”.
You configure scheduled paths on the Start element by clicking “Add Scheduled Paths (Optional)”. There are two options:
On the canvas, a scheduled path appears as another connector leaving the Start element. Behind the scenes, Salesforce queues the interviews and runs that branch at the scheduled time, in system context, using the user who made the original record change as the running user for actions.
Every flow needs somewhere to store and manipulate data while it runs and that is what resources are for. These are the containers your flow can read from and write to, completely separate from permanent fields on your Salesforce records.
You create them from the Manager tab (New Resource) and often from the elements themselves. Once they exist, you can plug them into just about anything: Decision conditions, Assignment elements, record updates, screen components, and so on.
A variable is simply a value the flow can store and change while it runs, and you choose a data type for it, like text, number, Boolean, record, collection, and so on.
Use variables to hold anything the flow needs to remember or pass between elements: user input from a screen, IDs returned from a Get Records, flags like isHighValue, or even an entire record.
When you need to work with more than one item at a time, a collection variable steps in. It’s just a variable that can store multiple values or records (for example, a “Collection of Opportunities”) this is what allows the flow to loop through a set of items and process them one by one.
A constant is a value you define once and reuse throughout the flow, and it never changes while the flow runs. They’re perfect for fixed values you reference in multiple places such as a standard discount percentage, a default status, or a URL used across several elements.
Instead of hard‑coding the same text or number in multiple steps, store it in a constant and reference it. If the value ever needs to change, you update it in one place and the entire flow automatically picks up the new value.
A formula resource works just like a Salesforce formula field, but it only exists inside the flow. It doesn’t store a value; it calculates one every time you reference it, based on other resources and fields.
Use formulas to perform calculations, build conditional text, or generate dates such as “today plus 30 days if the Account is a Customer, otherwise today plus 60 days.” Because formulas can reference variables (which change as the flow runs), they can be even more dynamic than standard formula fields on an object.
A text template is for any longer or formatted text you want to build once and reuse: email bodies, screen messages, error descriptions, and so on. They support merge fields and basic HTML formatting, so you can do things like Hi {!Contact.FirstName}… or build rich error messages that pull in variable values or record fields.
The benefit is that you keep this content in one place, which makes it far easier to update later than hunting through multiple screen components or hard‑coded text values.
A choice resource is what you use when a screen needs the user to pick from a set of options.
There are a few types, but they all serve the same purpose: supplying values for picklists, radio buttons, multi‑selects, and similar components in Screen elements.
The main ones you’ll use are:
These resources make flows far easier to maintain because you’re not hand‑typing lists of options that already exist in Salesforce.
Stage resources exist purely to make screen flows feel nicer to use. Each Stage represents one step in your process, and you can wire them up to a progress indicator at the top of your screens.
You define stages as resources (with an order number), then use the global variables $Flow.ActiveStages and $Flow.CurrentStage to tell the progress indicator which stages are in play and which one the user is on. This is great for multi‑screen flows like onboarding or guided cases where users want to know “where am I and what’s left?”.
Flows are built by chaining the elements together with the connectors so that data, logic, and user interaction all line up to support a single business outcome.
A typical pattern starts by collecting or looking up data (Screen and Get Records), then applying logic (Decisions, Assignments, Loops, Filters, Sorts, and occasionally Transform) to decide what should happen, and finally committing the result with data elements (Create, Update, Delete, or Roll Back) and Actions for integrations or notifications.
Wait elements add time and event awareness by pausing and resuming the flow when conditions or dates are met, while subflows and fault paths give you structure and safety by extracting reusable routines and centralizing error handling so that even complex automations stay understandable and maintainable over time.
Designing an intuitive, user‑friendly experience is just as important as getting the logic right. A well‑designed screen flow guides users smoothly through a process, reduces friction, and increases adoption by making it obvious what to do now and what will happen next.
A clear layout is the foundation of a good screen experience. The Section component lets you divide an area of the screen into up to four columns within a 12‑column grid, so you can group related fields and reduce unnecessary scrolling while still keeping everything aligned. Use sections to put closely related fields side by side (for example, First Name and Last Name) and keep longer or more complex fields on their own row so the screen feels structured rather than crowded. For multi‑screen flows, give users a sense of progress with clear titles such as “Step 1 of 3: Contact Information”, or by using a custom progress indicator pattern that visually shows where they are in the journey.
Modern screen flows can respond instantly to user input, and using that capability thoughtfully is a big part of building good flows. Conditional visibility lets you reveal or hide individual fields, whole sections, or entire components based on whatever the flow already knows, like earlier answers, values from a retrieved record, the result of a formula, or even data returned from an API call. When used well, this keeps screens focused on what matters and prevents users from wading through fields that aren’t relevant to them.
Reactive components take this a step further by updating in real time as values change. A user choosing a country can immediately update the list of states, adjust instructions, or surface additional fields without needing to click “Next” just to refresh the screen. This kind of dynamic behaviour makes flows feel faster and more natural, but it also supports better design: instead of scattering logic across multiple screens, you can often consolidate it into a single, intelligent screen that adapts as the user progresses.
The key to using these features well is intention. Dynamic behaviour should simplify the experience, not surprise the user or hide essential information. When applied with care, conditional visibility and reactivity help you build flows that feel clean, responsive, and purposefully designed; the kind of flows people trust and enjoy using.
Clear guidance helps users get things right the first time. Use Display Text to provide short, focused instructions, and apply rich text (bold, colour, emphasis) sparingly so that only the most important points stand out. Configure built‑in component validation (such as required fields, length checks, formats like emails or postal codes, or comparisons between dates) to catch issues as early as possible and return friendly, specific error messages so users know exactly what to fix. You can also relabel buttons so actions like “Submit application” or “Review details” are clearer than the defaults of “Next” or “Finish”, which makes the flow feel tailored to the process.
A polished flow should feel like a natural part of Salesforce rather than a separate app. Follow the principles of the Salesforce Lightning Design System (SLDS): clarity, efficiency, consistency, and beauty. Lean on standard components and SLDS‑aligned spacing, alignment, and typography so your screens blend seamlessly with the rest of Lightning Experience. Leave generous whitespace and resist the temptation to pack every field onto a single screen; two well‑spaced screens are almost always better than one dense, intimidating one. Consistent styling, modest use of colour, and thoughtful grouping of fields all signal quality and help users move through the flow with confidence.
If your org already has UX or design standards, treat your screen flows as part of that ecosystem: match the same tone, layout conventions, and component patterns so users are not jumping between wildly different experiences.
Before diving into mechanics, it helps to have a few design principles in the back of your mind. These are the habits that turn a working flow into something maintainable.
The rest of this section puts those principles into practice with concrete patterns and examples.
A good flow starts with a clear understanding of the business process it supports. Map what actually happens: who starts the process, what data comes in, what decisions are made, and what the expected outcomes and exceptions look like. A quick sketch of the happy path plus key edge cases gives you a solid foundation before you open Flow Builder.
Once the process is clear, outline the flow at a high level before you add elements. Capture its purpose, the objects it touches, and any related ticket or user story in the flow description. Inside the flow, keep element labels and resource descriptions short, specific, and focused on why something exists, not just what it does. This context is invaluable when you or someone else comes back months later.
Readable, predictable naming makes a flow much easier to scan. Patterns such as Object_Action_Context for flow names keep things organised, and simple prefixes for variables and collections (for example, var_ , col_ ) help you recognise their purpose instantly. Consistent naming is one of the easiest ways to make a flow maintainable as it grows.
For example, Case_Flow_1 tells nobody anything. Case – Set SLA on Status Change or Opportunity – Create Renewal on Closed Won tells you exactly why the flow exists and when it should fire.
Hard‑coded values make flows fragile. IDs, usernames, queue names, record types, and other environment‑specific details often differ between sandboxes and production, and they can change after refreshes or metadata updates. The flow will still activate, but it may quietly point at the wrong thing.
Instead of pasting fixed values into a field, use Get Records to look up something stable such as DeveloperName, API Name, or Username and use the returned value. Put environment‑specific configuration like a default queue or integration user into Custom Metadata, Custom Settings, or Custom Labels and read it from there. For picklists or business rules that may evolve, store the values in configuration rather than embedding them directly into Decisions or Assignments.
As flows become more complex, modularity becomes essential. Breaking logic into subflows keeps each piece focused, testable, and reusable, and it prevents any single flow from turning into a sprawling, hard‑to‑maintain diagram. A layered approach works well: a thin record‑triggered layer that responds to data changes and hands off to autolaunched subflows for the heavy lifting. Then separate screen flows for user interactions can call those same autolaunched subflows where needed. This separation keeps your automations clean, reduces duplication, and makes it easier to safely extend behaviour over time without mixing background automation with UI.
Be deliberate about how many record‑triggered flows you have on the same object, and make sure each one has clear, tight entry criteria so you always know why it is firing. Salesforce supports both a small number of broadly scoped flows and multiple smaller flows per object; the important part is choosing a strategy, documenting it, and sticking to it.
Recursion is a common pitfall, and it doesn’t only happen inside a single flow: Flow A can update a field that triggers Flow B, and Flow B can then update something that triggers Flow A again. Without guardrails, this can loop until you hit limits. Build in checks to prevent a flow from re‑firing itself by using strict entry conditions, “is changed” logic, or a small flag field that marks when an update has already been handled. These patterns keep your automations predictable and prevent runaway loops.
Fault paths should be added to the parts of your flow that can genuinely fail like Create, Update, and Delete operations, Apex or HTTP calls, and any subflow that performs those actions. When something goes wrong, give users a clear, human‑readable message that explains what happened and what they can do next, rather than exposing raw system errors. At the same time, log the full technical details for admins in a durable place such as a custom Error Log object or a platform event, including the record involved, the flow and element name, and the underlying exception. This combination of friendly user messaging and detailed admin logging makes troubleshooting far easier and keeps your flows predictable and supportable.
Salesforce Flows run inside the same transaction model as Apex, which means they share the same governor limits for SOQL, DML, CPU time, and memory. Good flow design isn’t just about logic, it is also about ensuring your automation behaves predictably when lots of records are processed at once.
Use this table as a mental checklist when designing any automation:
| Limit | Why It Matters | Flow‑Safe Pattern |
|---|---|---|
| DML operations (150) | Too many Create/Update/Delete calls cause failures in bulk updates | Stage records in collections; perform one bulk DML |
| SOQL queries (100) | Excess Get Records calls exhaust limits | Use one broad Get Records then Filter the collection |
| Executed elements (~2,000) | Large, branching flows can exceed element execution | Consolidate logic; use Transform instead of loop‑mapping |
| CPU time | Heavy loops or complex formulas can time out | Move heavy work async; simplify branching |
| Heap / interview memory | Large collections or unnecessary fields cause memory errors | Query only needed fields; avoid oversized collections |
A flow that works perfectly for one record can fail catastrophically when triggered by a data load, integration, or mass update. Designing with limits in mind ensures your automation is fast, predictable, and resilient.
There are two common ways to organise record‑triggered flows, and both work well when applied consistently.
For most orgs, especially when you are starting out, smaller, well‑named flows with specific entry criteria are easier to understand and maintain than a single, broad flow. Whatever pattern you choose, the essentials are the same: document your approach, keep the number of active flows per object manageable, and use Flow Trigger Explorer as your source of truth for execution order. It shows every flow for a given object and event (before/after create, update, delete), lets you reorder them, and highlights asynchronous paths.
There are times when automation needs to be skipped, such as bulk data loads, backfill jobs, or operational fixes where records need to save without running every rule. Turning flows off and on is risky and hard to track, so it’s better to design explicit bypass switches from the start.
A simple approach is:
Some teams centralise this logic in a subflow or invocable Apex action that reads a Custom Metadata “Trigger Configuration” record and returns a Boolean such as Is_Enabled__c. The flow simply calls that logic and either continues or exits. The principle is the same in every case: treat bypassing automation as an intentional, auditable behaviour rather than a last‑minute workaround.
Before activating a flow, run through the happy path, the edge cases, and the different failure scenarios. Use realistic data rather, and don’t forget to test in bulk; a flow that behaves perfectly for one record can act very differently with a hundred. Consider stepping through the flow in a sandbox with Debug, and, where possible, mimic the flow running as different users to confirm that field‑level security and sharing behave the way you expect.
After deployment, keep an eye on your automations. Make a habit of checking Paused and Failed Flow Interviews whenever someone reports unusual behaviour. That view often shows exactly which element failed, for which record, and with which error message, long before you need to open debug logs. A simple inventory of flows, with owners and last‑modified dates, also helps you maintain visibility as your org evolves.
For your most important flows keep a small regression checklist: a handful of records and scenarios you manually run after major deployments. It feels old‑fashioned, but it catches issues that automated tools often miss.
It’s also worth standardising on an error‑handling subflow that fault paths can call. That subflow can log to a custom Error Log object, send notifications, and surface a friendly message to users, giving you one place to improve error handling over time instead of re‑implementing it in every flow.
Managing flows from development to production requires an understanding of how flows are stored, versioned, and deployed. Good flow administration ensures your automations remain reliable, traceable, and easy to maintain as your org evolves.
Flows are stored in Salesforce as the Flow metadata type. Behind the scenes, each flow is represented as an XML definition containing its elements, resources, and logic. Salesforce automatically versions your flows: every time you save, a new version is created. Only one version of a flow can be active at a time, and Salesforce enforces a limit of 50 versions per flow, so it’s good practice to periodically delete old, inactive versions to keep things tidy.
Versioning is part of building good flows. Clear version descriptions, consistent naming, and a habit of deactivating and cleaning up unused versions make it far easier for future admins (including future you) to understand how a flow has evolved and which version should be deployed.
By default, flows deploy to production in an inactive state. An admin must manually activate the new version after deployment. If your deployment process requires flows to become active immediately, you can enable “Deploy processes and flows as active” in the target org’s Process Automation Settings. Use this setting carefully as it removes the safety net of reviewing the flow before activation.
Flows are the platform‑native, admin‑friendly automation tool best suited to internal processes, record automation, and moderate UI needs but they’re not the only way to automate a process in Salesforce. Their strength lies how easily they can be built and maintained by admins, making them the natural first choice for most internal workflows.
Every now and then you will meet a process that is too big for a single flow but still feels like declarative automation, not a custom coded application. That is where Flow Orchestrator fits. It lets you stitch multiple flows together into stages and steps, combining background work and human tasks into a single, trackable journey.
Think of a multi‑team onboarding process, a complex service delivery, or a multi‑step approval that bounces between departments. You could try to model all of that in one monster flow plus scheduled paths and subflows, or you can use an orchestration to coordinate smaller flows, see where each run is up to, and handle pauses, failures, and reassignments in a more structured way.
OmniStudio, including OmniScript, serves a different set of needs as it is designed for complex, highly structured, often customer‑facing experiences where you need more control over layout, branding, and cross‑system orchestration than Flow comfortably provides. OmniScripts let you build guided interactions that feel like a polished web application, while Integration Procedures and Data Mappers handle the behind‑the‑scenes work of pulling, transforming, and combining data from Salesforce and external systems. This makes OmniStudio a strong fit for Industry Cloud implementations and any scenario where you’re delivering a multi‑step journey to customers or partners.
Apex remains the right choice when you need high performance, bulk processing, or fine‑grained transaction control that declarative tools can’t offer. It’s ideal for logic that’s too complex to model visually, operations that must run at scale, or integrations that require custom handling, error control, or specialised authentication flows. When the requirement is less about logic and more about delivering a bespoke user interface, Lightning Web Components (LWC) complement Apex by giving you full control over the client‑side experience like styling, interactivity, and behaviour that go well beyond what Flow or OmniStudio can provide.
Taken together, these tools form a complementary ecosystem rather than a hierarchy. Flow gives you fast, maintainable automation for the majority of internal use cases. OmniStudio gives you the structure and flexibility to design rich, branded, multi‑system experiences for customers and partners. Apex provides the precision, performance, and transaction control needed when declarative tools reach their natural limits, while Lightning Web Components offer a path to fully bespoke user interfaces when you need fine‑grained control over the client‑side experience. Good architecture comes from choosing the right tool for the job and knowing when to combine them thoughtfully so each one plays to its strengths.
| Criteria | Salesforce Flow | OmniStudio (OmniScript) | Apex / Code |
|---|---|---|---|
| Primary use | Internal automation and guided screens | Branded, multi‑system guided experiences | Complex algorithms, bulk processing, custom integrations |
| Data handling | Strong with standard Salesforce objects; can call externals | Orchestrates Salesforce + external systems via Integration Procedures and DataRaptors | Full control over external APIs, transformations, and auth |
| UI control | SLDS standard components; reactive screens | Pixel‑perfect UIs (FlexCards, OmniScripts) | LWC/Aura for bespoke interfaces |
| Licensing & skills | Included with core Salesforce licenses; admin‑friendly | Requires OmniStudio/Industry licensing; specialist skills | Included with org but requires developer skills |
| When to pick | Fast admin delivery; low–medium complexity | External customers; multi‑system orchestration; branded UX | Performance, bulk, or transaction control needs |
Start with Flow for most internal automation. It’s quick to build, easy to maintain, and works best when your data and users live inside Salesforce. Use before‑save flows for simple field updates and autolaunched flows when you need reusable logic or orchestration.
Choose OmniStudio when you’re designing a structured, branded experience for customers or partners, especially when the journey spans multiple systems. OmniScripts, Integration Procedures, and Data Mappers give you the control and performance needed for these more demanding, multi‑step interactions.
Turn to Apex when the problem is fundamentally about scale or complexity. Large data volumes, intricate logic that doesn’t translate well into a visual model, or integrations that require custom handling, error control, or specialised authentication. Apex is also where you go when you need explicit transaction control or performance guarantees that declarative tools can’t provide.
Flows can hit governor limits when they grow too complex or process large volumes of data. Testing with realistic datasets and offloading heavy work to asynchronous Apex or Integration Procedures helps keep them reliable.
OmniStudio introduces licensing and skill considerations, so it’s best reserved for high‑value external journeys where its capabilities genuinely matter.
Mixing multiple tools without a clear ownership model can create long‑term maintenance challenges. Centralising shared logic, documenting decisions, and keeping a clean version history all help maintain clarity as your automation landscape grows.
Automation is most powerful when it’s paired with structured human review. In Part 4 — Approval Process, you’ll see how to design, configure, and govern approval flows that route the right work to the right people without becoming a bottleneck.
Salesforce provides a generous set of free learning resources to help you deepen your understanding of Flow and the wider automation ecosystem. Trailhead is the best place to start as it’s hands‑on, approachable, and kept up to date with each release. Here are a few curated modules that build on the concepts in this guide and give you space to practice them:
Build Flows with Flow Builder is a comprehensive practical trail that starts with the Flow Basics for a gentle introduction to the building blocks that power flow. It then moves through modules on data and logic as well as Record-Triggered Flows and Screen Flows to take a deeper look at building guided, user‑friendly screens and collecting input effectively. Finally it ends with Loops in Flow Builder
While going through this trail, you might want to look at some of the hands-on projects like Build a Simple Flow where you will use Flow Builder to capture and update contact information with a flow.
Having done all of these you may feel ready for the Screen Flow Fundamentals Superbadge which is a a hands-on technical skills assessment 😅